Manage your schedule
Once you’ve created a schedule (as explained in the How to Schedule Automatic Backlink Checks section), you can easily view, edit, or remove it from the Dashboard or Schedule settings.
View schedule status

- Go to the Dashboard tab to see:
- When the last check ran
- When the next check is scheduled
- Current frequency
- List of notification emails
Modify schedule
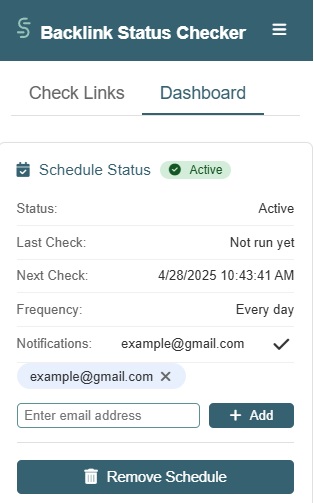
- To modify the email notification list
- Navigate to the Dashboard tab
- Click the pencil icon (✏️)
- Add new emails by clicking on the +Add button
- Remove existing emails by clicking on the remove icon (x)
- To remove the schedule:
- Click “Remove Schedule” in the Dashboard or Schedule section
To change the frequency of checks, you’ll need to remove the current schedule and create a new one with your desired frequency. If you want to change any additional check options, you will also need to remove the active schedule and set up a new one.
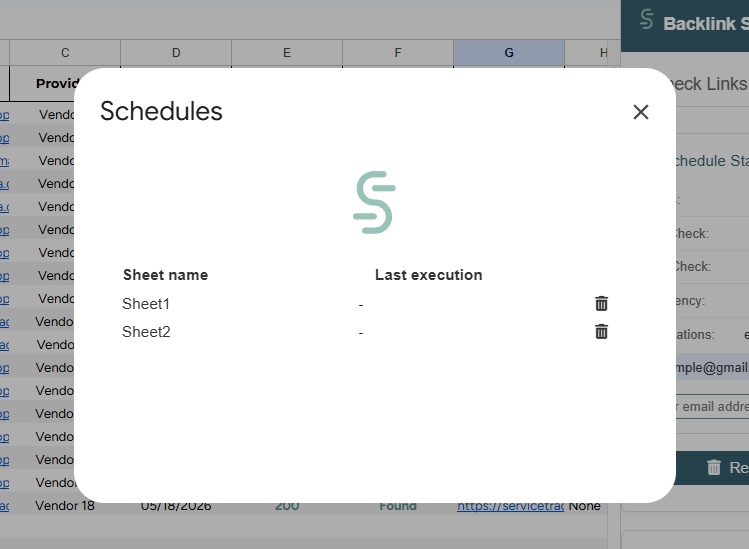
View all schedules
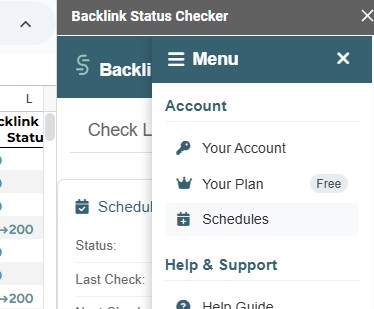
- Click the menu icon (≡) in the top right
- Select “Schedules” to see all active schedules
- Use the delete (🗑️) icon to remove active schedules
- Confirm your choice in the popup
Important notes
- Only one schedule can be active per sheet
- Scheduled checks run automatically even when the spreadsheet is closed
- Email notifications include a summary of check results
- Failed checks will be reported in the email notifications
- Scheduled checks use the same settings as manual checks – configure these before creating a schedule